本文主要跟大家一起来见证价值2000元的电动汽车DIY制作全程。眼下油价天天都在涨,电动汽车正是当红,在网上搜索了很多四轮电动车的原理,今天我们就一起DIY一辆仅需2000元的电动汽车吧!
数据(由托马斯谢勒):
速度= 15 -17公里每小时;
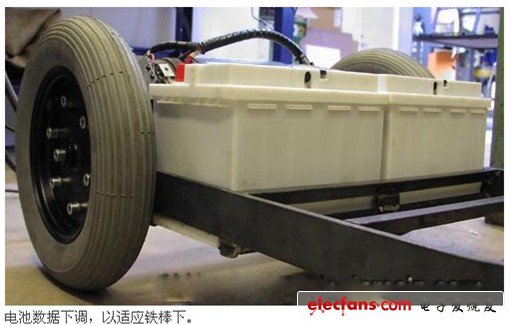
总重量=77.8公斤 重量打破:与运动单位=32.7公斤底盘,前轮=3.4千克,后轮=7.8公斤,电池× 2 =14.5千克
座位= 2.8公斤,脚踏板=0.9公斤,方向盘=0.4公斤,电子和电缆= 1公斤
长度= 120厘米(包括轮) 宽度后= 66 前= 60厘米宽
功率= 2 × 13.8V 55Ah铅酸二级汽车batterys
电动机differantial 24V的20 - 100号A的负载的不同单位(取自旧轮椅)
制动系统,电气磁体系统,电机和制动器
速度控制=脉冲宽度控制计算机系统(待定)


全部是手工制作,用板条和焊接转向


很容易使用旧自行车的ballbaring制作


座椅采用的是10mm的胶合板,直到材料焊接到位。

作为可以打开实用铰链,然后进入chargeplug,电池和speedregulator将是容易的。


如何使木方向盘


首先,我提出六个M5的线程,3胶合板的铝枢纽被切断时,然后在车床上
将它们一个一个连接起来
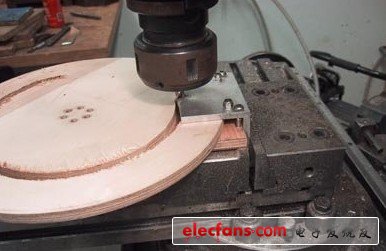

我必须做出一个类似铣床的工具,这样我能得到我需要的东西

最后粘合所有3个部分,第二天更多的工作是在车床上进行...

经过20分钟的车床加工以及第一层清漆后的形状

将方向盘安装好

安装好后灯

装好踏板
这是最愚蠢的方式来测试这个gocart最高车速,用一只脚按下启动开关,然后就推gocart到一个公平的速度,然后留言“新闻发布会斯彼得”,然后留言“释放斯彼得”奥利弗试验drive.avi 800kb 这里是7秒DivX4的视频剪辑,请注意他的脚大部分时间是用来慢下来了!

我们作出了几次测试室内becoarse是耳边和平常一样,外面风大,我的孩子是非常激动,电机力量和速度远远超出了我们梦寐以求的!