一、配置Modelsim ISE的Xilinx的仿真库
1、编译仿真库:
A、先将Modelsim安装目录C=Modeltech_6.2b下面的modelsim.ini改成存档格式(取消只读模式);
B、在DOS环境中,进入Xilinx的根目录,然后依次进入bin,nt目录;
C、运行compxlib -s mti_se -f all -l all -o C:Modeltech_6.2bxilinx_libs。
注意:需要根据你安装的modelsim目录更改C:Modeltech_6.2b
然后就Ok了,就可以的ISE中启动Modelsim进行所有的仿真了。
2、如何在Xilinx ISE中使用Modelsim ISE,Synplify进行综合和仿真:
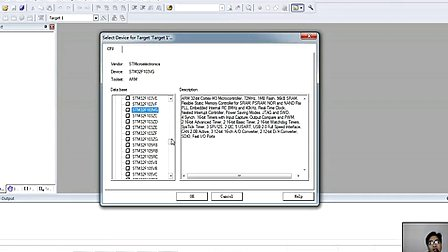
A、打开Xilinx ISE,新建一个Project;
①、在菜单File中选择“New Project”,弹出如下的对话框:

②、输入Project名称,并选择好Project保存的路径,然后下一步:

按照上边的参数进行设置(针对于Spatan 3E的开发板),然后单击下一步,进入到后面的界面:

③、单击“New Source”按钮,并按照下面的设置来操作:

④、参照下面的参数,进行设置,然后一直选择默认选项,一直到完成。

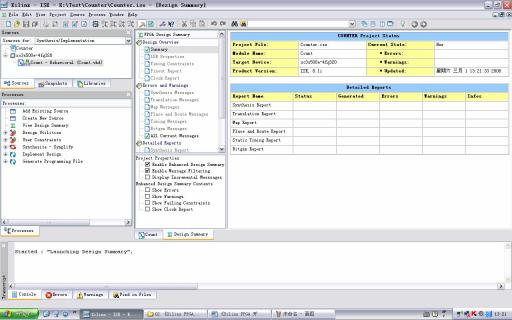
最后生成的项目界面如下图所示:
B、输入代码,然后用Synplify综合:
①、参考代码:
entity Count iS
Port(CLK :in STD_LOGIC;
RESET :in STD_LOGIC;
LOAD :in STD_LOGIC;
DATA IN:in STD_LOGIC_VECTOR(3 downto 0);
Qout :out STD_LOGIC_VECTOR(3 downto 0));
end Count;
architecture Behavioral of Count is
signal tmpCount:STD_LOGIC_VECTOR(3 downto 0);
begin
process(CLK,RESET,LOAD)
begin
if RESET='1' then
tmpCount<="0000";
else
if LOAD='1' then
tmpCount<=DATA_IN;
elsif CLK'event and CLK='1' then
tmpCount<=tmpCount+1;
end if;
end if;
end process;
Qout<=tmpCount:
end Behavioral;
②、双击Processes窗口里面的“Synthesize-Synplify”进行综合

③、在“Transcript”窗口中的可以看到综合的信息。
C、时序仿真:
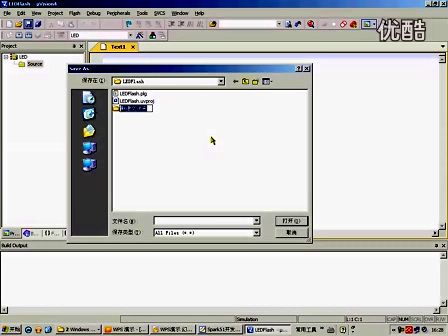
①、从菜单“Project”中选择“New source”。按照下图所示输入,然后选择下一步

②、在“Associate source”选择需要进行时序仿真的HDL代码,然后选择下一步

③、在弹出的窗口“Initial Timing and Clock Wizard-Initialize Timing”中选择默认的配置

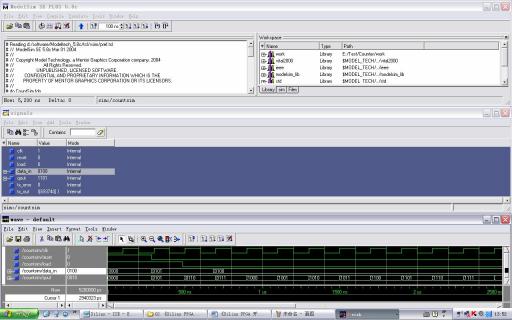
④、当出现如下的界面后,你就可以进行时序仿真了^_^

⑤、在Sources选择Behavioral Simulation,在Processes的ModelSim Simulator中双击下面的任何一个都可以进行仿真。区别就是一个在Xilinx ISE中进行,一个则在ModelSim界面中。

⑥、下图是双击“Generate Expected Simulation Results”的效果

⑦、下图是双击“Simulate Behavioral Model”的效果
⑧、接下来大家就可以写代码,然后仿真验证了,^_^